 "Nakazoto" (Nakazoto)
05/13/2018 at 08:43 Ľ Filed to: None
 17
17
 12
12|
"Nakazoto" (Nakazoto)
05/13/2018 at 08:43 Ľ Filed to: None | 17
| 12 |

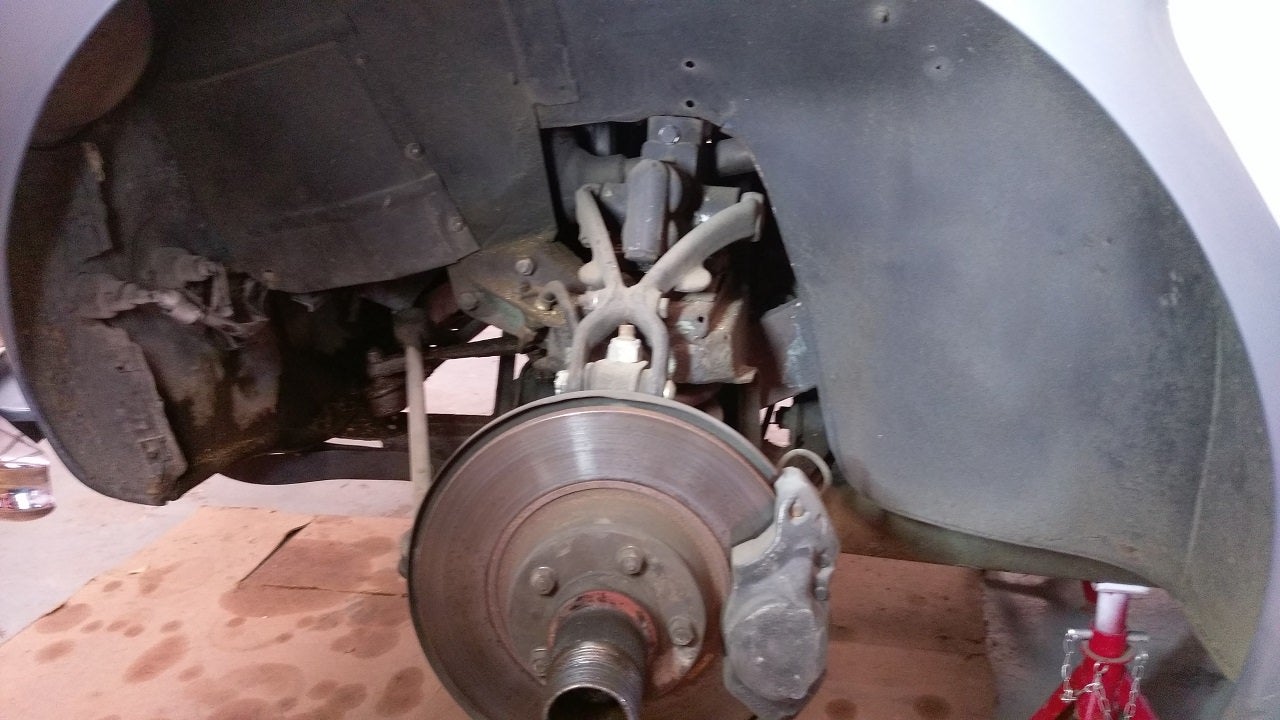
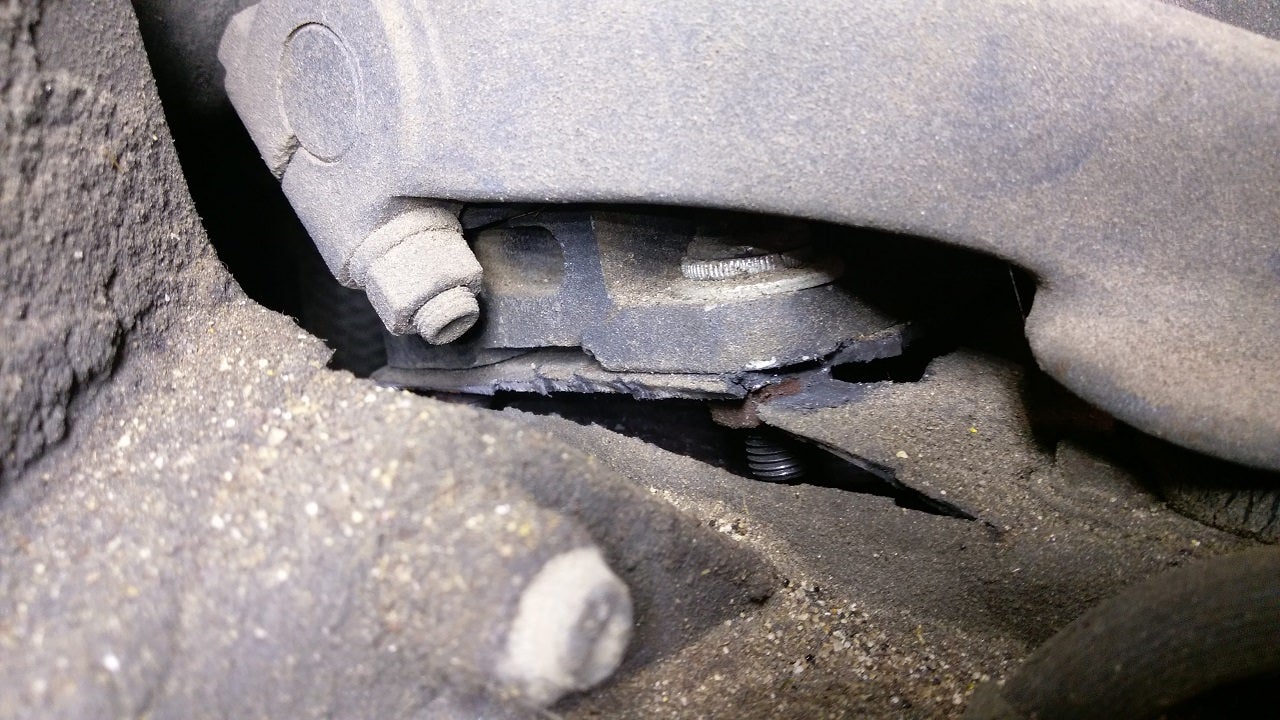
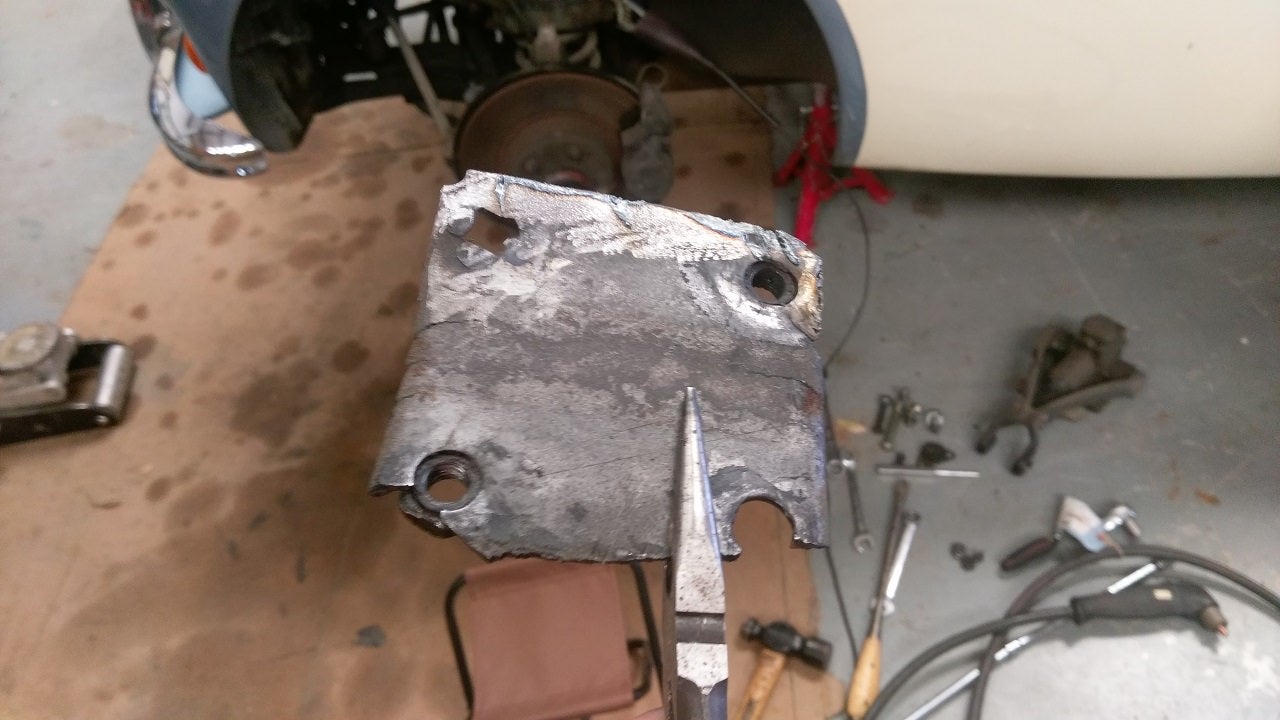
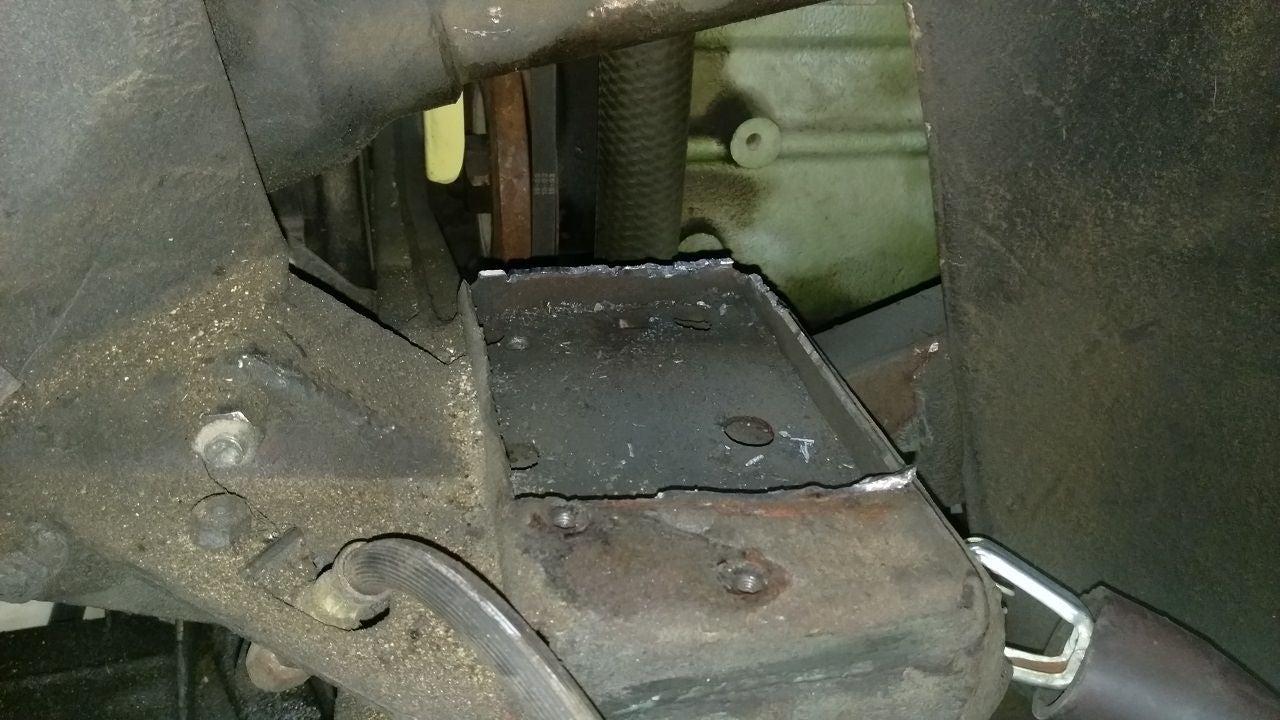
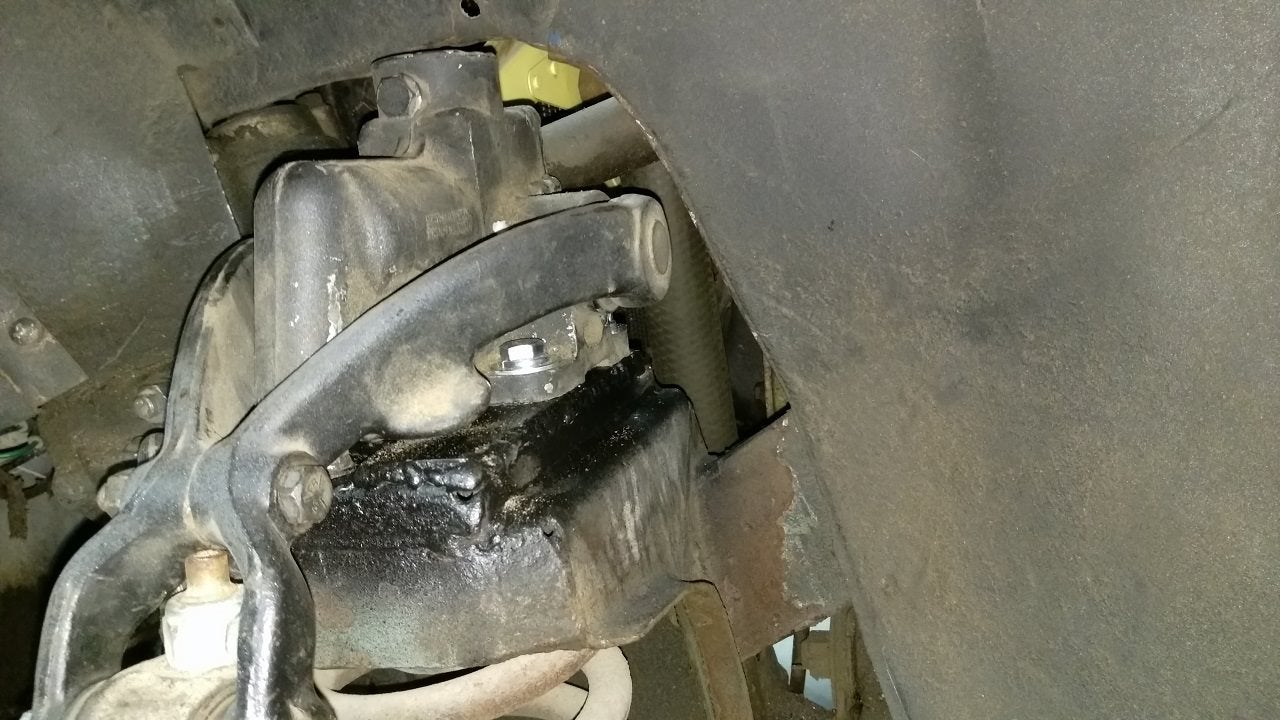
About two weeks ago when we were driving the Healey, I heard an awful metal on metal noise, so I parked it in the garage and told everyone not to drive it until I could get a look at it. Well, work and what not meant that day wasnĺt until today. I jacked it up, pulled the wheel off and found the upper shock/wishbone frame mount ripped up and broken, letting the shock slam into the fender! (It should be noted that the Healey uses an insane lateral shock absorber that is directly connected to the upper wishbone as one piece.) That was not good, if that mount had ripped completely out, that could have been really bad. I checked the passenger side to see if it had suffered the same fate and it hadů about 35 years ago. Someone had already welded on an entirely new top plate, and it wasnĺt us.

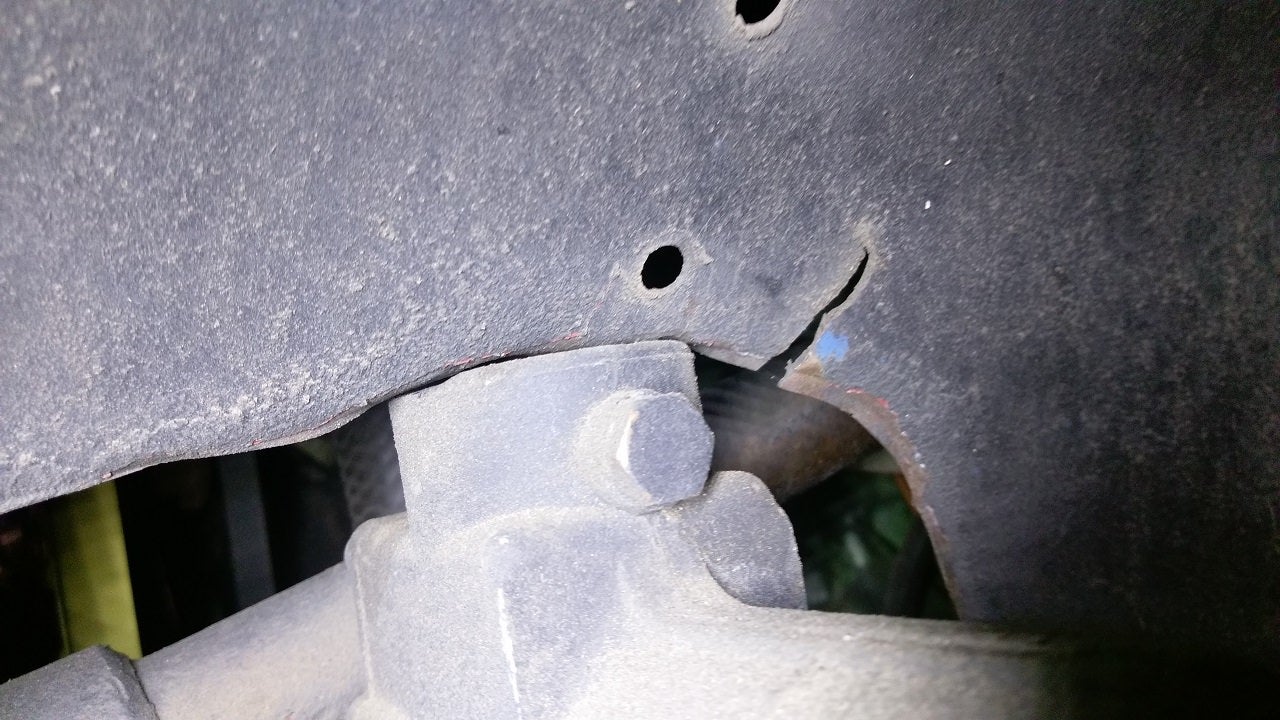
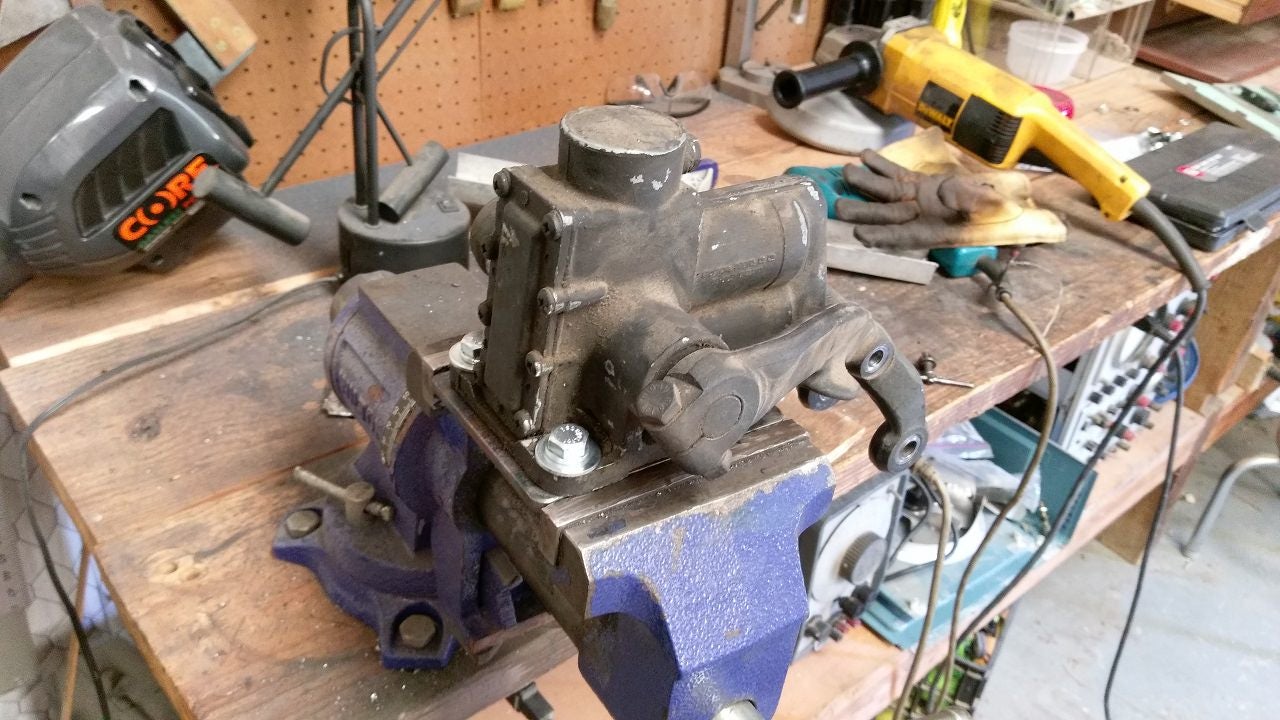
So, knowing that I have a ton of translation work slated for the next few days I had a choice. Either leave it like it is for another week until I can get back into it, or fix it today (well, yesterday to be honest). I had an idea on how to fix it, so I chose the today (yesterday) option. First thing I did was get the plasma cutter out and cut out the remaining bits of the mount. There wasnĺt much holding it on, but enough to require a bit of cutting.
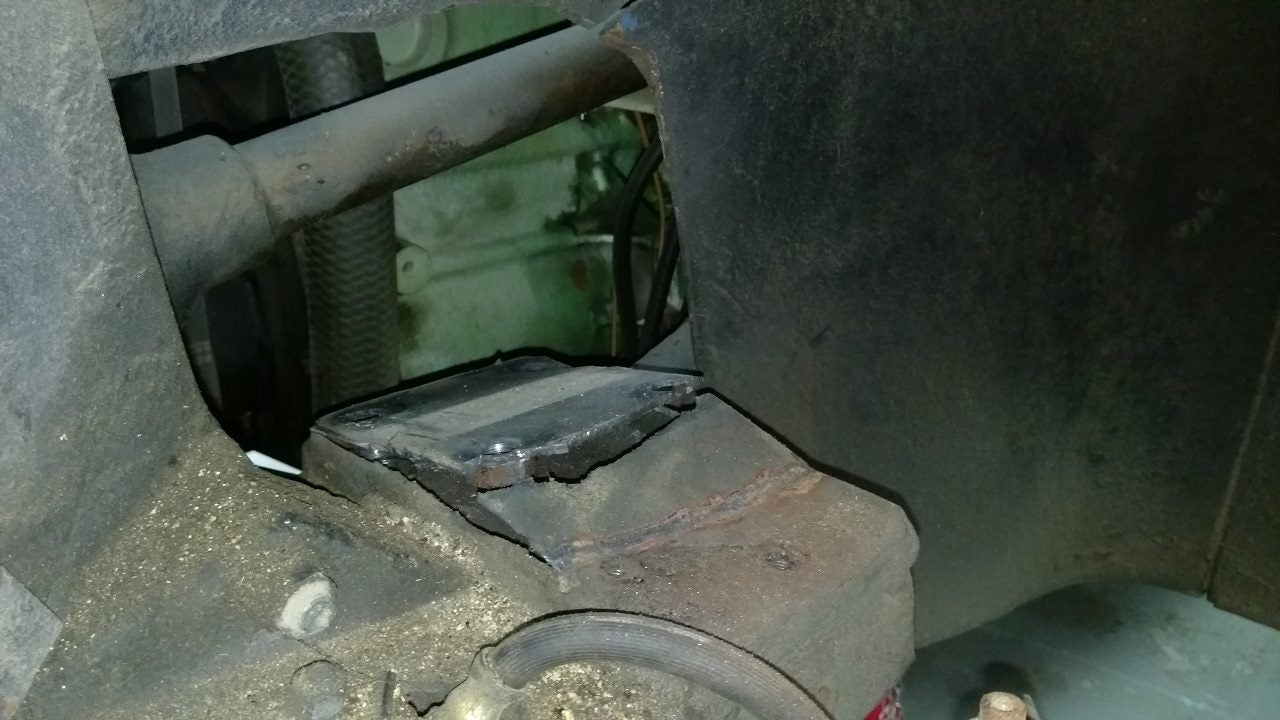
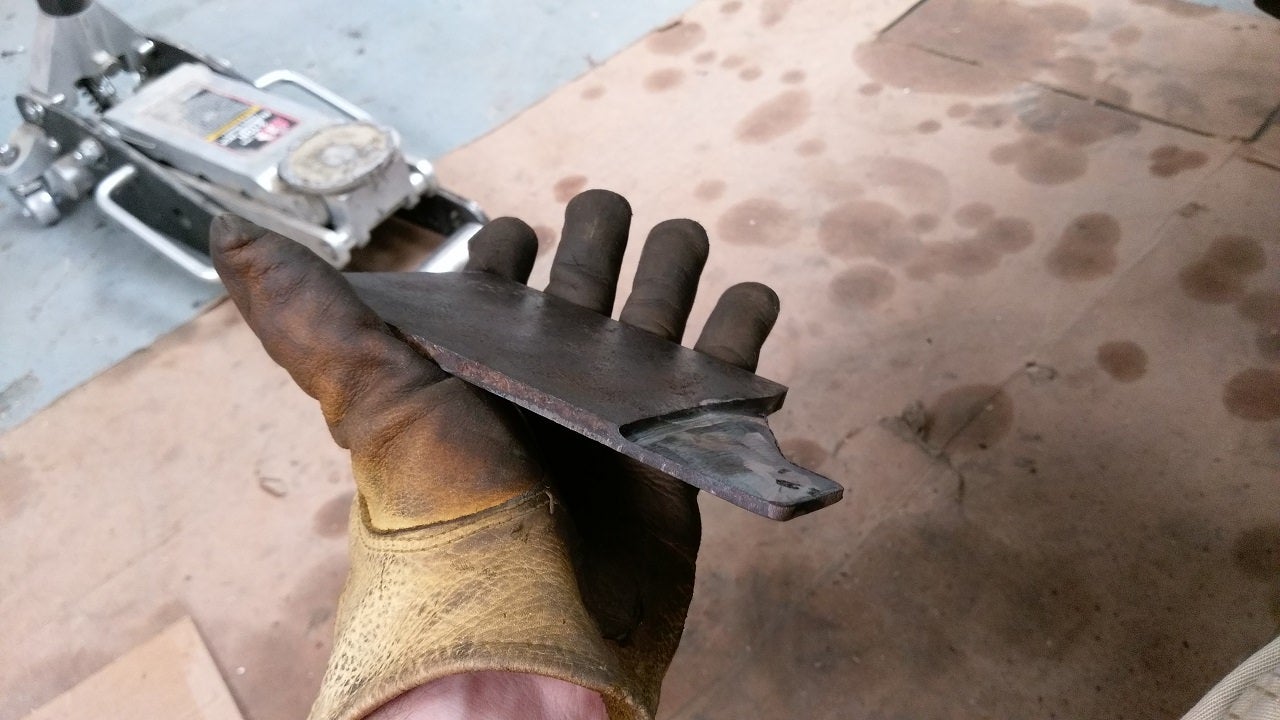
With the top cut out, I made a cardboard mockup and started working on the piece Iĺd weld back in. We had this massively thick sheet of steel hanging around, so I grabbed that and used the skill saw to cut out the rough shape. After that it was repeated back and forth with a massive angle grinder. Grind, check fitment, grind some more, check fitment again, and repeat for a few hours. I then ground the back side of the protruding front piece down a bit. The reason was because that front piece actually sits on top of the remaining metal, and I wanted the main body of the top plate to sit down inside the hole a little bit to give me a better seam to weld to.

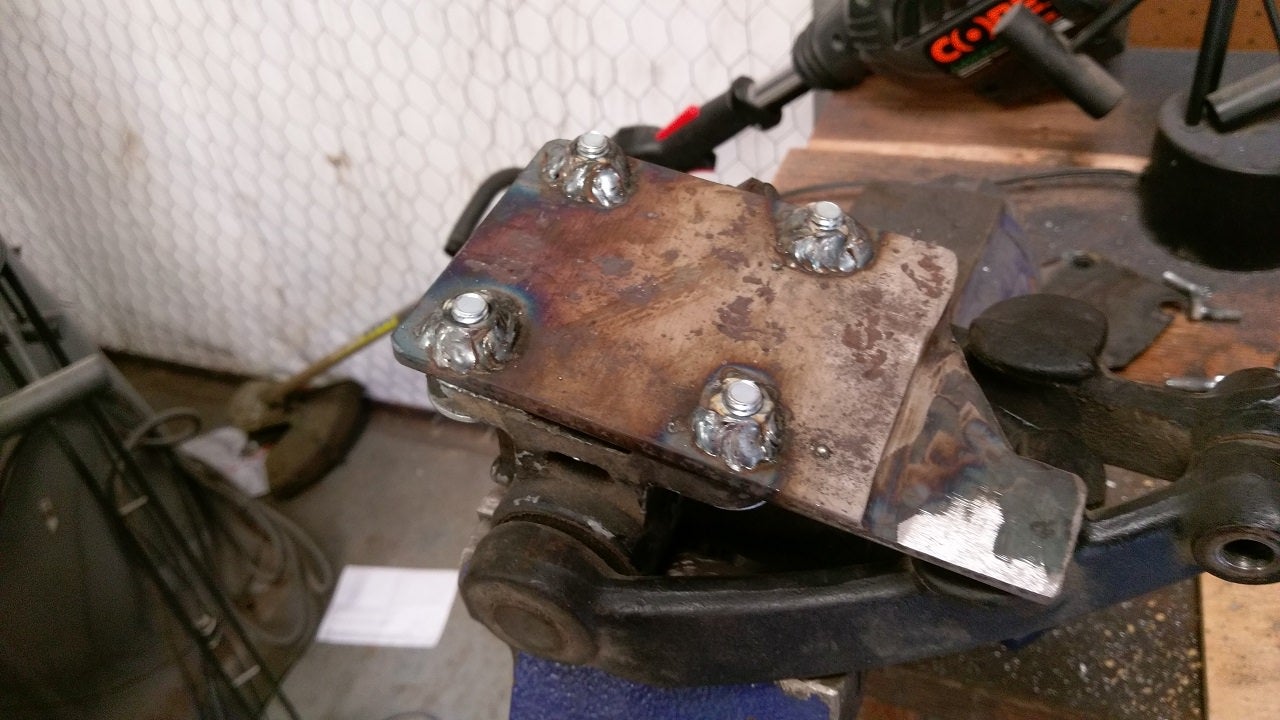
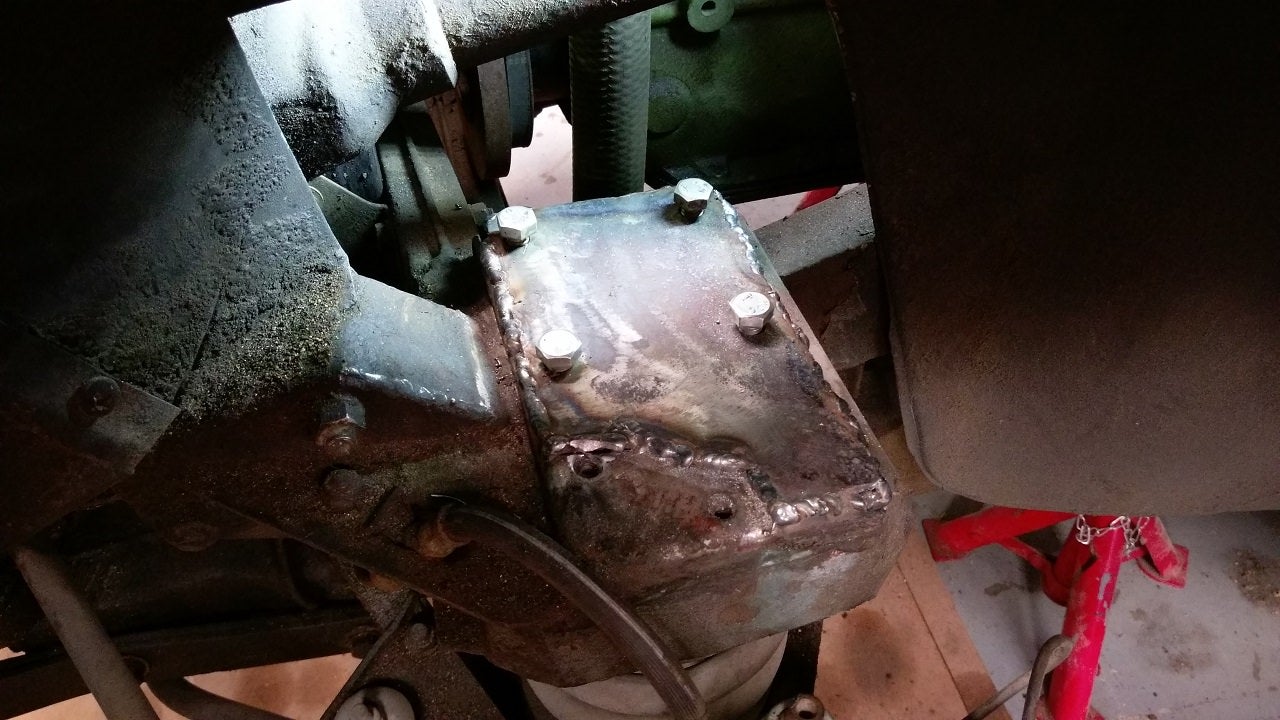
Once I was happy with the shape, I measured up the mounting holes for the upper shock/wishbone, drilled those out, and welded on the encapsulated nuts on the back side. Then, after cleaning everything really well, I popped the new steel in place, using long bolts through the encapsulated nuts to hold it at exactly the height and position I wanted, and I welded it all in place. All in all, not the prettiest welds, but plenty strong with good penetration.

I put some undercoating paint on it, bolted it all back together andů then I fixed the toe. It had a massive amount of toe out. Not sure why as moving the top plate shouldnĺt affect the toe that much. Then again, both sides have been cut and repaired, and Iĺm fairly certain the car was in an accident long before we ever bought it, so thereĺs no telling what was causing what to happen under there. I eyeballed the toe into place and then took her for a test drive.

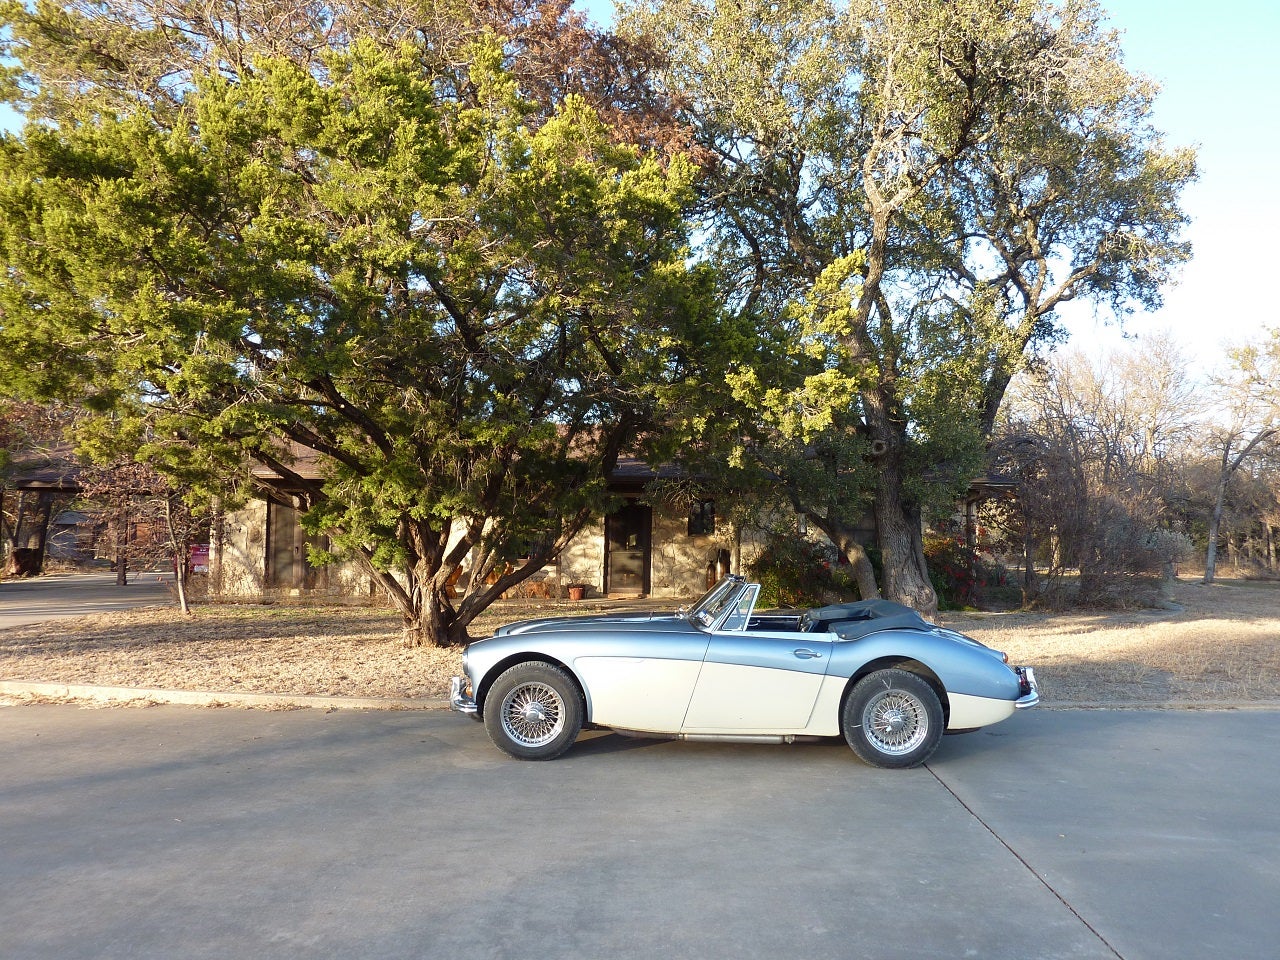
My fix worked perfectly. I leaned on the old girl pretty hard, even hammered it up to a pretty good clip and aside from pulling to the left a bit, she drives great again. I think popping it on an alignment rack and seeing exactly what is where, and then adjusting it all into spec will make her handle better than she has in a long time!

What an interesting day, haha.
 RallyDarkstrike - Fan of 2-cyl FIATs, Eastern Bloc & Kei cars
> Nakazoto
RallyDarkstrike - Fan of 2-cyl FIATs, Eastern Bloc & Kei cars
> Nakazoto
05/13/2018 at 09:12 |
|
Such a gorgeous old car - very nice fix David! How long did it take you, all and all? Glad sheĺs back on the road! Any word on the 117? :)
 RacinBob
> Nakazoto
RacinBob
> Nakazoto
05/13/2018 at 10:14 |
|
Bravo
 shop-teacher
> Nakazoto
shop-teacher
> Nakazoto
05/13/2018 at 10:51 |
|
Nicely done!
 Urambo Tauro
> Nakazoto
Urambo Tauro
> Nakazoto
05/13/2018 at 12:11 |
|
Well done! Itĺs too bad whoever did the other side didnĺt take a moment to reinforce this one.
 rb1971 ARGQF+CayenneTurbo+E9+328GTS+R90S
> Nakazoto
rb1971 ARGQF+CayenneTurbo+E9+328GTS+R90S
> Nakazoto
05/13/2018 at 13:28 |
|
Thatĺs really cool. And the ride is gorgeous.
I donĺt know why they wouldnĺt have fixed both sides at the same time back when they did the first one tho. I guess maybe 35 years ago these were just old cars? Seems like that canĺt be true.
|
Nakazoto
> RallyDarkstrike - Fan of 2-cyl FIATs, Eastern Bloc & Kei cars
05/13/2018 at 17:54 |
|
Took me about 9 hours from pulling the wheel to taking it for a test drive! Not bad for a dayĺs worth of work. It still definitely needs and alignment, and I really want to see what the camber and caster looks like, but thatĺs something for another day.
For the 117 Coupe I finally got in all the parts I need to get on with building the engine. I found a good head and got that rebuilt, bot me a ball hone for honing the bores and a new set of rod and main bearings, rings and full seal kit. Now I just gotta find the time to get out there and do it.
|
Nakazoto
> rb1971 ARGQF+CayenneTurbo+E9+328GTS+R90S
05/13/2018 at 17:56 |
|
My guess is that the other wasnĺt cracked yet so ôif ainĺt broke donĺt fix itö. Seems to me it would have been smart to do both at the same time before something bad happened. Although, youĺre right, 35 years ago, these were fairly cheap and there were a lot of them available, so people didnĺt tend to treat them like they do today.
|
Nakazoto
> Urambo Tauro
05/13/2018 at 17:56 |
|
Yup, it could have ended up very badly if it had broken completely off!
|
Nakazoto
> RacinBob
05/13/2018 at 17:56 |
|
Thanks!
|
Nakazoto
> shop-teacher
05/13/2018 at 17:57 |
|
Thank you!
 arl
> Nakazoto
arl
> Nakazoto
05/13/2018 at 19:06 |
|
Awesome work - and awesome car.
|
RallyDarkstrike - Fan of 2-cyl FIATs, Eastern Bloc & Kei cars
> Nakazoto
05/13/2018 at 19:18 |
|
You work quickly! :D
Looking forward to more updates on all your rides! Still have to watch the Sticker Shock ep with your Minica in it....love that little thing! :D